This is the last part of this series of tutorial. If you have read all previous tutorials in this series, then you must have an understanding about how to color using Photoshop vector. In this part we will just add some text to our composition.

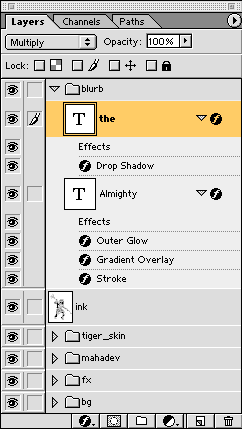
I just added a text layer copied it to make the second one and typed 'the' and 'almighty'.
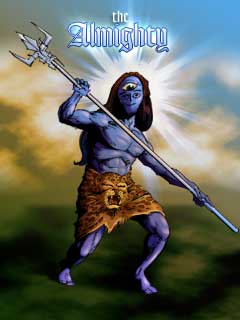
I selected the fonts accordingly so that it shouts and also matches with the theme of this image.
Then as you can see there on the layer stack, I added some layer effects to the text layers to stylize them

And here is the result - instantly. ok?
I hope god will not curse me for experimenting with his image. I have good faith in god and I also believe in Eric Von Daniken, so both the alien and immortal form of god is equally appreciable to me.
Part 1 : Creating a workspaceThis is the simpler part of this tutorial - adding a blurb to the image.
Part 2: Coloring the character
Part 3 : Coloring accessories
Part 4 : Adding shadows and highlights
Part 5 : Painting the drappery
Part 6: Creating a background
Part 7 : Adding effects
Part 8 : Creating the blurb

I just added a text layer copied it to make the second one and typed 'the' and 'almighty'.
I selected the fonts accordingly so that it shouts and also matches with the theme of this image.
Then as you can see there on the layer stack, I added some layer effects to the text layers to stylize them

And here is the result - instantly. ok?
I hope god will not curse me for experimenting with his image. I have good faith in god and I also believe in Eric Von Daniken, so both the alien and immortal form of god is equally appreciable to me.
Comments
Post a Comment